
Assembling Kits
As with all fibreboard and cardboard kits, there are a few precautions that are wise to take:Removing Pieces from
Sprues
Take care when pushing the pieces out of their sheet. Press firmly and evenly. Cardboard and fibreboard are made of layers and it’s easy to leave a layer behind on the sprue if uneven force is used. This is especially true for complicated shapes.It’s a Dirty Business
Lasers cut through sheet material with a focussed beam. This relies on the optics of the machine being nice and clean. As luck would have it, our preferred material - MDF - throws up piles of sawdust when cut. (Expensive, clean acrylic sheet, anyone?) So the laser machine needs constant cleaning. Excessive dirt will have an adverse effect on the cut. However clean the machine is kept, though, there’s always a chance of a tough spot. And fibreboard (MDF) is a natural product, which doesn’t help. (Expensive acrylic sheet, anyone?) All this means is that it’s always better to push pieces out of their sprues from the back of the sheet. Because if the laser has lost any power or the material is more solid then the bottom layers of board may need to be broken. An even push from the back of the board should produce a clean break. The back of the board is the side with the thinner cut lines.Cardboard Pieces
Caution should be taken when pressing out pieces from cardboard sheet. Where possible, flex the sheet first. It can be practical to cut out and isolate small pieces by making a rough cut around them first.Don’t Lose the Small Guys
Some small pieces can look remarkably similar; don’t get confused by mixing all the pieces up. Keeping unassembled pieces on a tray or in a container can help keep everything organised.Don’t Rush In
It’s always best to try a dry run first before gluing permanently. If a mistake is made, MDF can be remarkably forgiving. However, if a mistake is impossible to salvage, Supreme Littleness can be contacted and it may be possible to replace damaged pieces for the price of postage.Paint before Gluing
Before gluing, determine accessibility. In some cases, it will be impossible or extremely hard to paint the interior, for example, of a model after the kit has been assembled. So, paint and decorate pieces that would otherwise be inaccessible before assembly.


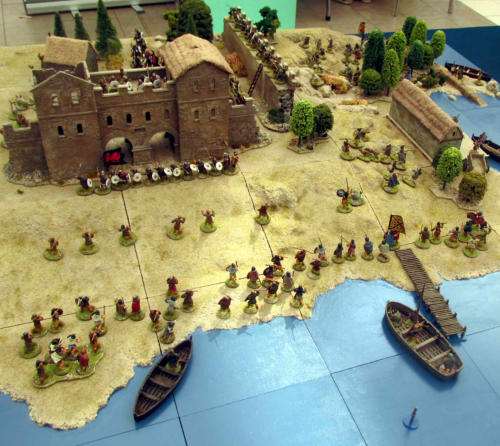
ABOVE Supreme Littleness Designs’ table display of a
Dark Age reoccupied Roman Fort at Cramond,
Edinburgh, that won Best in Show at Claymore 2016. The
boats, buildings, carts and ladders were all made from
laser-cut MDF.
______________________________________________
Gluing Pieces
White wood glue should be used to glue fibreboard and cardboard pieces together. If the model is to be painted, it is best to avoid using ‘waterproof’ PVA. Strong and ‘tacky’ PVAs are recommended. Glue should be spread thinly and evenly on BOTH sides to be bonded. Visible excess glue should be removed before it has had time to dry. Old brushes, pins and cocktail sticks are all useful tools in the gluing process.Slap on the Texture?
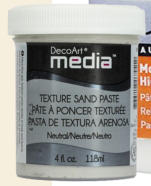
The look of some MDF and card models will be greatly enhanced with some sort of textured paste spread over them. There are many examples of models with added texture on this site. A simple tile grout from a DIY shop is recommended. Tile grout is a sandy cement that adds a gritty look to the flat surface of MDF. Artists’ acrylic medium or modelling paste is perhaps more expensive but much easier to paste on fibreboard. The wax and resin binders of the MDF can resist a dry grout. Adding water or PVA can help but can also make the texture smoother than desired. Acrylic medium is available in many grades of grittiness and is as simple to paste on as acrylic paint as it is just paint without pigment.Non-textured Texture?
Small assembled kits that might be overwhelmed by sandy textured paste can be enhanced with a thin spread of non-textured acrylic medium. This is especially useful spread over the sometimes unsightly corner joints. The walls of the 10mm saltbox house model (left) was textured with a smooth acrylic paste applied with a wooden cocktail stick. Accentuating the horizontal strokes, allowed some nice highlights for the paint to pick up.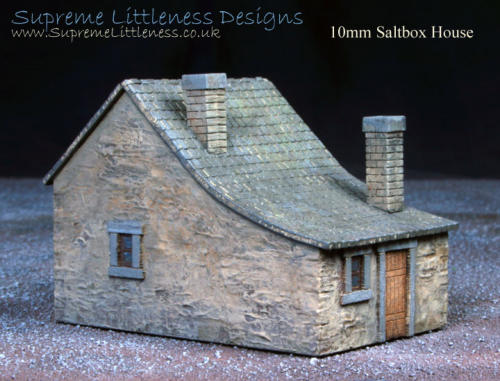


TOP TIP
The strength of the
completed
fibreboard model
will be improved
by applying a thin
spread of tacky or
strong white-glue
to both surfaces to
be glued.


BIG NEWS! SLD products back on sale in a brand new shop!


